Archives

Glitter Queens Blog Hop Day Three

bloghop


lg butterfly

Today is the last day of the Glitter Queen Blog Hop and it has been a blast!

bermuda wreath   wreath calypso

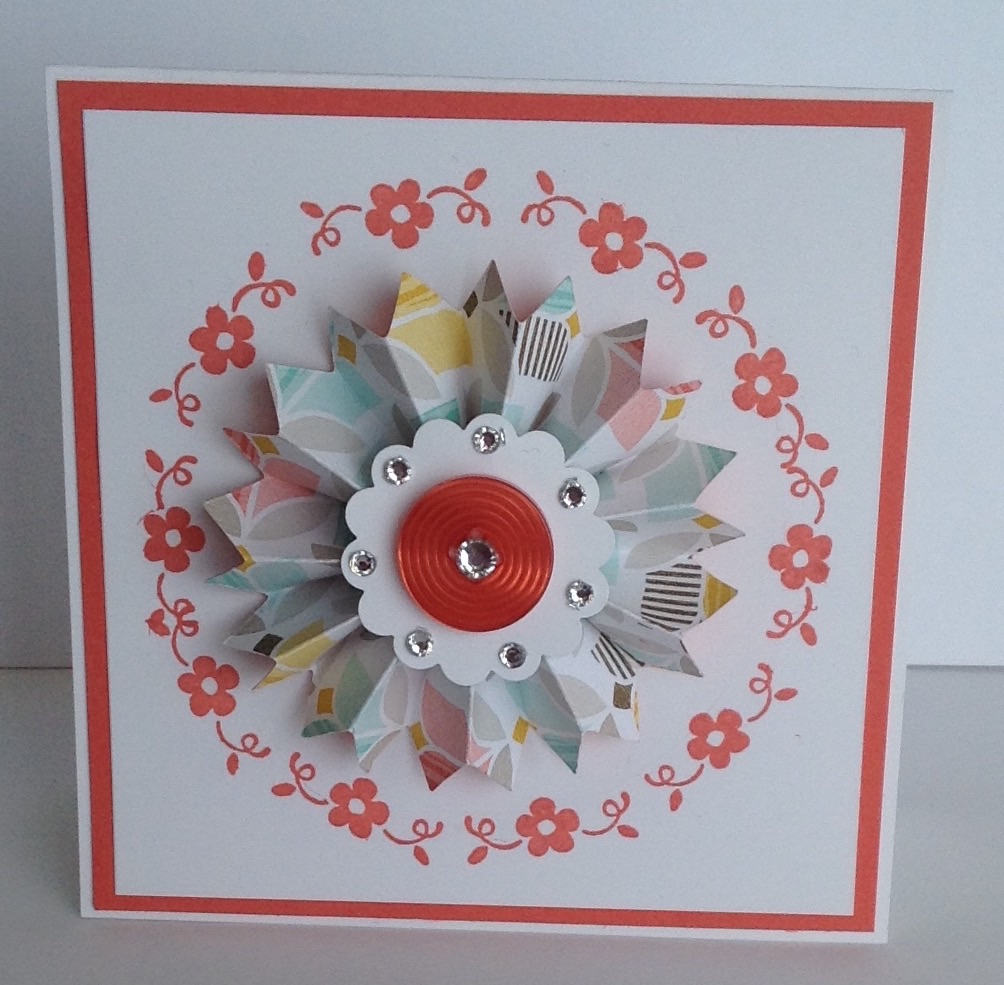
Okay, I was surfing YouTube the other day and came across a video that was so awesome! This lady took a single flower from the stamp set “Simply Wonderful” (page 16 in the Sale-A-Bration catalog) and made a wreath out of it. I was so excited to try it! And I knew exactly what I wanted to put in the center of this wreath. Yep, a Lollie!

lg teal

I just fell in love with this wreath! So many ways to use it! Here I used the butterfly from the Butterflies Thinlits Dies which are available now in the Stampin’ Up! Occasions catalog.  I used Coastal Cabana and Bermuda Bay on this card. The size of the card is 4″x 4″.

melon thank you

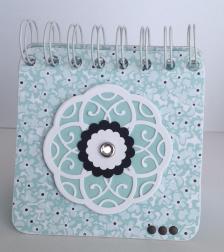
After making the 4 x 4″ cards, I decided to adapt the wreath to fit 3 x 3″ cards.  They turned out great! These ones here are Melon Mambo.

burmuda thankyou


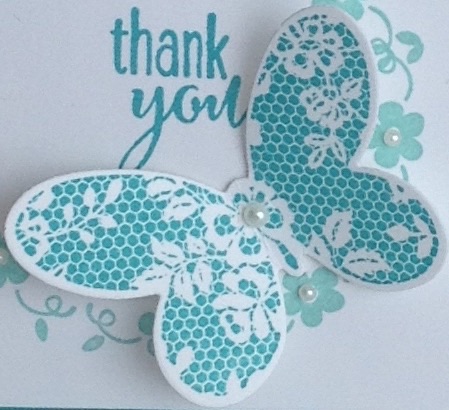
On these 3 x 3″ cards I used the “Butterfly Basics” stamp set and coordinating “Butterflies” Thinlits die. (Also in the Occasions catalog.) This lacy butterfly if so pretty.

elegant thank you

Elegant Eggplant was used on these cards.

lg sm

The difference in size with the 3″ & 4″ cards.

triple thankyo

These will be my “thank you” cards for anyone who places an order with me in February.

thankyou group

If you have this set and want to make your own wreath, go here to see the video. If you don’t have this set but would like to get it, all you have to do is place an order of $50 or more and you can get it free now through March 31, 2015! Feel free to contact me with any questions. To place an order click HERE.

Click the button below to go to the next one on the blog hop. Thanks for stopping by!

bloghop   next     previous

Here are the other blog hop participants. Click on their names to go directly to their blog.

Dawn Griffith

Jennifer Kay

Dee Slater

Sue Novick

Tracy Bradley

Kris Miller

Glitter Queens Blog Hop Day Two of Three

bloghop


teal


I have often wished I could make my own bag with Designer Series Paper that would be big enough to hold a stamp set.

tealbag

I was surfing YouTube one day and came across a video that was perfect for making such a bag! This one above I made with the “Best Day Ever” free paper that is available right now from Stampin’ Up! Sale-A-Bration with a $50.00 or more purchase.  And the buttons and ribbon called “Best Day Ever Accessory Pack” are also available for free with a $50.00 or more order.

cherrycobblerbaf

This bag I made with retired Designer Series Paper. What a great way to use up some of the paper that has been sitting around! And what better way to decorate then with a Lolly or Rosette?!

bags2

This photo shows the size of the bag. It easily holds a stamp set plus room for lots more. It takes 2, 12×12″ sheets of paper. It measures  7″ tall x 6″ wide x 3″ deep. Very quick and easy to put together. Now I can have matching bag and card! Click here to watch the video.

Thanks for stopping by. Don’t forget to click the link to go to the next Blog Hop!

bloghop    next                previous


Other Blog Hop participants: Just click on their name to go directly to their blog.

Dawn Griffith

Jennifer Kay

Dee Slater

Sue Novick

Tracy Bradley

Kris Miller

Glitter Queens Blog Hop Day One of Three

bloghop


large lolly

I am SO excited! This is my first blog hop to participate in. My team members, “The Glitter Queens,” invited me. This will be a 3 day blog hop so be sure to stop by tomorrow and Wednesday to see what special items we’ve chosen for you.

hanging

I love, love, love, to make Lollies or Rosettes. This past Christmas I made a lot of them. I added ribbon and hung them on gifts (see photo above), I did a class for them, and I handed them out and decorated my tree with them. Everyone loved them!

gift trio

Unfortunately, I only have a few left and I didn’t take pictures of the ones I gave away.

square

They don’t all have to be round!  (As I placed this on the red background to take a picture today, I thought, “What a pretty card this would make.”)

first postit

Also this past Christmas I made a bunch of Post-It note holders out of chip board and coasters. I made so many in fact, that I still have quite a stash of them. The one above is my very first one. I cut the chip board and sanded and inked the edges. It is quite a lot of work unless you are only going to do one or two. I made quite a few this way until my coasters arrived!

teal rosezette  tealpostit inside

The coaster Post-It note holders were easier since they were already cut. This shows the inside. The 3×3″ Post-It notes work great.

teal no lolly  bow

The two above aren’t decorated with Lollies but are just as pretty.

eggplantpostit  green

It is so much fun trying different patterns of paper. Also, decorating the tops with different embelishments.

3 lollies


lollies

This is a good way to use up some of that retired DSP you have. I used the Stampin’ Up! Rosette bigz XL die to make my Lollies but you can also get the same affect with the score board. Just score every 1/4″. I used 2 strips about 11 1/2″ long and 2″ wide to make 1 Lolly for my Post-It note covers.

So are you ready to see what the next person on the blog hop has in store for you? Just click the “Next” button below. There is also a list of participants and you can go directly to their blog by clicking on their name.  Thanks for stopping by! Please come back tomorrow. I have more fun stuff planned for you!

Dawn Griffith

Jennifer Kay

Dee Slater

Sue Novick

Tracy Bradley

Kris Miller

bloghop      next    previous